How to Hip Thrust to Build a Perky Butt and Stronger Glutes
Here’s why the thrust is a must!
Ok, we’ve all heard about the hip thrust and we’ve probably all tried it. It’s been a hot topic on the lips of influencers, personal trainers and fitness fanatics for a few years now. But just why is the hip one of the best exercises for women aiming to build strong glutes and sculpt their derrière? Well, Not only is this one of the most effective exercises exercises for targeting the gluteus maximus and gluteus medius, but it’s also versatile, with numerous variations to suit different fitness levels. Let’s dive deep into why the hip thrust is an essential exercise and how you can do it at home or the gym for maximum impact.
1. Direct Activation of the Gluteal Maximus
The primary reaon the hip thrust is such a great exercise is its unparalleled ability to achieve glute activation. While the barbell squat, lunges and the romanian deadlift do work the glute muscles, they often engage other muscles, like the quadriceps and hamstrings, to a significant extent. Hip thrusts, on the other hand, place the glutes under maximum tension, ensuring optimal activation and growth of the glute muscle group and posterior chain. For those who want to a bigger butt without adding size to their leg muscles, this makes the thrust on of the ideal glute exercises.
Not only that, the glute maximus is our body’s largest muscle so targeting this muscle also makes the thrust a calorie burning superstar!
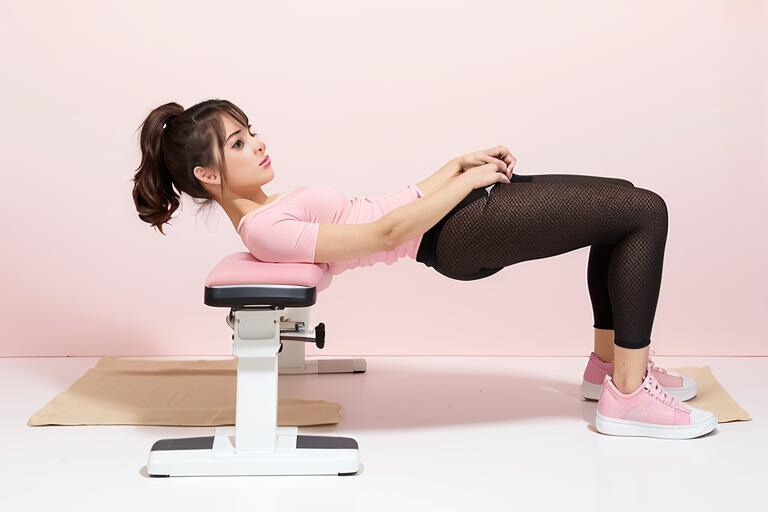
2. Performing the Hip Thrust Exercise
Here’s the best way to do the hip thrust for maximum glute development:
- Find a Stable Surface: You will need a weight bench, couch or hip thrust pad to lean against for this exercise. Make sure this can handle the weight of you leaning against it without slipping or moving.
- Establish a Strong Starting Position: Sit on the floor with your back against your chosen device. Your shoulder blades should rest just above the edge, if this is not the case and the height cannot be adjusted, try placing a cushion or pad beneath you. Now focus on foot placement. Your feet need to be flat on the floor, shoulder width apart. They should be close to your body but far enough away from your body to create approximately a 90-degree angle when you are at the top of the hip thrust. If your feet are too far out, you will know as you will feel the move more in your hamstring than in your glutes.
- Focus on Form: Once you are set up in your starting position, brace your core muscles you can slowly start to move your hips up, making sure to keep your torso in a straight line. Focus on pushing through your feet as though you are pushing the ground away from you. Make sure your upper and lower leg create a 90-degree angle before slowly coming back down to the starting position to make sure you achieve a full range of motion. If you are using a barbell or other weight, hold on to this for the whole exercise. To maximize the benefits of the hip thrust and avoid injuries, it’s vital to maintain proper form. Ensure your chin remains tucked, ribs down, and avoid overarching the back. Always drive through the heels and actively engage the glutes throughout the movement.
- Perfect the Execution: Whenever we do strength training we have a tendency to speed up to get the exercise over and done with. It is especially important not to do this with the hip thrust. Undertake this movement slowly and in a controlled way, ensuring you hit the top of the hip thrust, squeezing the glutes at the top before slowly lowering all the way back down until your butt almost touches the ground again. Remember, this is called the thrust for a reason, you need to think of your hips moving forward almost like you are scooping them towards your head, you will know when you have this right as the glutes create that scooping motion and you will feel them, particularly when you have added resistance with weight.
- Add Resistance for Glute Development: While we recommend starting with just body weight or a lighter weight, as with all strength training, we need to add resistance to increase the challenge. This is normally done by using a barbell and creating progressing overload by adding weight plates. You can also use a dumbbell or place a weight plate directly on your pelvis. Another way to achieve more intensity is to target a greater range of motion to achieve this, you can consider placing your feet on a step or stool. Most gyms now have a hip thrust machine that is not only set up for a perfect range of motion but can easily have weight added to it without having to load up a barbell.
3. Hip Thrust Variations to Keep It Fresh
The basic hip thrust can be adapted in numerous ways to cater to individual needs and prevent workout monotony. While we always recommend keeping it simple to start with, focusing on progressive overload (gradually adding more weight each week) trying different types of the thrust can help you understand which one works for you best so you can maximize your results:
- Weighted Barbell Hip Thrust: This is the standard variation, where a loaded barbell rests on your pelvis as you thrust upwards. Padding is essential to prevent discomfort from the barbell resting on your hip bones and causing bruising. This will become especially important as you advance to heavier weights. Most gyms provide this but they often go missing so we recommend buying your own.
- Single-Leg Hip Thrust: By elevating one leg, you intensify the exercise, focusing on one glute at a time. This is especially useful for those of us that have a bit of asymmetry in our glute strength. This can also be a useful one to do at home if you don’t have access to weights as you can use what you have to load up one side. It is essential to maintain good form on these as you will have less balance with one foot off the ground.
- Banded Hip Thrust: Using a resistance band either around the knees or under the feet and over the hips provides a different kind of resistance, enhancing muscle activation. This can be the best option when starting out or as a warm up for other versions of the thrust
- Weighted Hip Thrust: While the barbell version is popular, you can also use dumbbells, kettlebells, or weight plates to add resistance and this can be a lot easier and quicker to set up than loading up the bar. As you find you are getting stronger and needing heavier weight, you will need to progress to a barbell or machine hip thrust.
- Machine Hip Thrust: We love these! Many gyms have machines hip thrust machines now which are a lot easier to load weights onto than a barbell. They are also set up in a way that means your foot placement is optimised and have built in padding in all the right spots.
- Glute Bridge: Another hip extension exercise that will also work the hamstrings and abdominals. Similar to the hip thrust but no bench or support needed, this movement starts with your back on the floor.
4. Safety and Accessibility
One notable benefit of the hip thrust is that, when performed correctly, it’s generally safer on the lower back compared to other compound exercises. This is especially crucial for those with existing back concerns. Additionally, since it can be done without weights or done with simple household items, it’s a highly accessible exercise for those who don’t have a gym membership and need to workout from home.
If you feel lower back pain at any point, we recommend you stop and check your position and if you are using weight, we recommend you lower it back down until you have perfected your form again. For any persistent issues always consult with a personal trainer for advice or a medical practitioner for any injury.
5. Adding it to Your Routine
Even though the hip thrust is a great way to build stronger glutes, it really needs to be part of a more comprehensive lower body building routine to ensure you do engage and grow your other muscles and don’t build strength on one muscle only. It is also likely your progress will plateau if the thrust is the only thing you’re doing.
We suggest you add the hip thrust to your routine 2-3 times a week to really see great results. We recommend starting with a warm-up set with very low or no weight and then performing 3-4 working sets and targeting a rep range of approximately 8-12. Make sure you progressively overload by either adding more weight, or increasing sets and reps. You’ll know when you’re really working as this exercise will get your heart pumping and you will be sweating. We also recommend trying some of the variations suggested above to avoid getting bored and to keep your workouts interesting.
Remember to always balance lower body workouts with upper body workouts as well to keep your whole body strong and shapely. Most people notice a difference in their glute strength and shape around the three week mark, with clothes fitting differently, cellulite smoothing out and the butt generally sitting higher and looking perkier. Who doesn’t want that?
For the best advice on how to get the most out of your hip thrust and the most effective plan available, we recommend the Rear Beauty Workout Plan. This is completely FREE and is available for download here! This plan comes in two downloads with over 70 pages of helpful information, exercise breakdowns and a comprehensive workout guide for you to follow. It is for beginners through to more advanced and even helps you design your own workout so you can tailor it for yourself. See for yourself why our readers have achieved such great results quickly and why it has received such great feedback.
Conclusion
When it comes to building firm, round, and powerful glutes, the hip thrust stands unparalleled. Its direct activation of the gluteal muscles, combined with its versatility and safety, makes it a top-tier exercise for those seeking optimal results. Whether you’re in a gym or at home, with weights or without, there’s a version of the hip thrust that’s perfect for you. So, next time you’re planning your glute workout, make sure the hip thrust is at the top of your list!